
To adjust the Peloton tread belt, refer to the manual for specific alignment instructions and use the provided hex key to fine-tune the tension. Carefully position the belt to ensure it runs straight down the middle of the deck.
Exclusive Deals
Limited-time Exclusive Deals. Check current discount on Amazon.
Check Price on Amazon As an Amazon Associate I earn from qualifying purchases.Proper maintenance of your Peloton Tread is essential for a smooth running experience. The tread belt, the surface that moves beneath your feet, may occasionally require adjustments to stay centered and prevent it from slipping. Regular checks can spot misalignments or slack, which could lead to uneven wear or potential safety issues.
Adjusting the tread belt is a straightforward process that you can complete at home, ensuring your workouts remain safe and effective. This initial setup and periodic tuning can significantly extend the life of your machine and enhance the quality of your exercise routine, keeping you moving towards your fitness goals with each stride.
Identifying Tread Belt Issues
Keeping your Peloton tread belt in top shape is key to a smooth run. Just like your car needs a tune-up, your tread belt requires regular checks. Wear and tear can lead to common problems. But don’t worry, spotting them early can save your workout and your machine. Let’s dive into how you can spot these sneaky issues before they trip up your training.
Exclusive Deals
Limited-time Exclusive Deals. Check current discount on Amazon.
Check Price on Amazon As an Amazon Associate I earn from qualifying purchases.Recognizing Misalignment
To ensure a safe and comfortable run, your Peloton’s tread belt must stay straight. A misaligned belt could mean it’s time for an adjustment. Here’s what to look for:
- A belt that’s drifting to one side
- Uneven wear patterns along the edges
- A feeling that your footing is off-center when running
Catching these signs early keeps your belt on track. A straight belt means a better run.
Detecting Tension Problems
A belt too tight or too loose spells trouble. It might need a tension tweak. Look out for these clues:
Exclusive Deals
Limited-time Exclusive Deals. Check current discount on Amazon.
Check Price on Amazon As an Amazon Associate I earn from qualifying purchases.- A belt that slips under your feet signals it’s too loose
- If it’s tough to lift the belt for a cleaning, it might be too tight
A belt with just-right tension will feel snug without hampering your stride.

Credit: www.amazon.com
Safety First
Ensuring your safety is crucial when performing any maintenance on your Peloton treadmill. Adjusting the tread belt might seem simple, but several important steps need to be followed. In this section, we’ll guide you through the process safely and effectively. Always remember, taking the right precautions will not only protect you but also your equipment from any potential damage.
Powering Down The Treadmill
Before you begin, turn off your treadmill. It’s a simple step, but it’s the cornerstone of safe maintenance. Here’s how:
- Locate the power switch on your Peloton tread.
- Flip the switch to the ‘Off’ position.
- Unplug the treadmill from its electrical outlet.
Never skip this step. Working on a treadmill that’s plugged in can lead to serious injury or even damage your treadmill.
Waiting For Components To Cool
After powering down, give your treadmill some time. The components inside can get very hot during use. You should:
- Wait at least an hour before touching anything inside the tread.
- Check if the belt and the motor area are cool to the touch.
This cooling period is essential to prevent burns or any discomfort. Once everything is cool, you can proceed with the adjustment of the belt safely.
Remember to always consult the Peloton manual for specific instructions related to your treadmill model. Follow these guidelines to ensure a smooth and safe adjustment process.
Tools And Materials Needed
Before diving into the task of adjusting your Peloton tread belt, gathering the right tools and materials is crucial. This preparation ensures a smooth and safe adjustment process. Let’s explore the essential items you’ll need.
Hex Wrenches And Screwdrivers
A set of hex wrenches is mandatory for belt adjustments. These wrenches come in various sizes. Your Peloton will typically require specific sizes. Make sure to have a full set to cover all possibilities.
- Small hex wrenches for fine adjustments
- Larger wrenches to secure bolts
Screwdrivers play a pivotal role as well. You might need a Phillips or flathead screwdriver. Check your machine’s manual for the exact type needed.
- Phillips head for common screws
- Flathead for slotted screws
Protective Gloves
Protective gloves keep your hands safe during the adjustment. They offer a firm grip and prevent skin abrasions.
- Choose sturdy gloves with good grip
- Ensure they fit well to maintain dexterity
With the right tools and materials at hand, adjusting your tread belt will be a breeze. Remember to follow the manufacturer’s instructions closely for the best results.
Adjusting The Belt Alignment
Proper alignment of your Peloton tread belt ensures a safe and enjoyable workout. Over time, your belt may drift or stretch, throwing it off-center. This guide walks through straightening the tread belt step by step.
Loosening The Belt
- Turn off and unplug the Peloton treadmill.
- Locate the belt adjustment bolts at the rear of the machine.
- Use an Allen wrench to turn the bolts counter-clockwise.
- Loosen both sides equally, no more than a quarter turn.
Aligning The Belt
With the belt loosened slightly, you can now reposition it. Start the treadmill at a low speed. Carefully observe the movement of the belt. If it shifts to one side, make adjustments.
| Belt Shifts Left | Belt Shifts Right |
|---|---|
| Turn left bolt clockwise a little. | Turn right bolt clockwise a little. |
Retightening The Bolts
Once the belt is centered, stop the treadmill. Turn off and unplug it again. Now, retighten the bolts by turning them clockwise. Ensure both sides are equally tight.
- Replug and restart the treadmill.
- Watch the belt at a low speed to confirm the alignment.
- If the belt stays centered, your adjustment is successful.
- If not, repeat the above steps until perfection.
Correcting Belt Tension
Tackling the task of correcting belt tension on your Peloton tread is key for a smooth workout. Too tight or too loose, and your running rhythm could be thrown off balance. Let’s get that tread belt just right to optimize your fitness journey.
Assessing Current Tension
Before adjusting the belt, let’s check the current tension. Power off the tread and unplug it. Feel the belt’s tension by lifting it from the middle. It should lift 2 to 3 inches. A belt that lifts higher or hangs lower needs attention to ensure safe, effective workouts.
Increasing Or Decreasing Tension
If your assessment reveals a need to adjust, don’t worry, it’s straightforward. You will need an Allen wrench to turn the tension bolts located at the back of the tread.
To increase tension:
- Turn bolts clockwise.
- Do a quarter turn each side.
- Alternate sides to maintain evenness.
To decrease tension:
- Turn bolts counterclockwise.
- Do a quarter turn each side as well.
- Keep alternating for balance.
After adjusting, walk on the tread to test. Check the belt travels straight and tension feels right. Power off and plug back in. Your Peloton tread is now ready, offering the perfect grip beneath your feet.

Credit: www.pelobuddy.com
Troubleshooting Common Issues
Your Peloton tread is an investment in your fitness journey. But, like any machine, it may need adjustments from time to time. Whether it’s a slipping belt or unusual sounds during your workout, addressing these issues early can prevent further damage. Let’s dive into some of the common issues and how to fix them, keeping your tread in perfect shape for those intense workout sessions.
Belt Slipping
If your tread belt slips, it can be both annoying and unsafe.
- First, check the belt tension. A simple turn of the tension bolts might be all you need.
- If that doesn’t fix it, assess the drive belt for proper tension.
The Peloton manual provides a clear guide on adjusting both. Tighten bolts equally to maintain belt alignment.
Squeaking Noises
Squeaks while you run can disrupt your focus.
- First, identify the squeak source. Is it the belt or the deck?
- For a belt squeak, lubricate as directed in your Peloton manual.
- If it’s the deck, it might need a quick lubrication touch-up.
Regular maintenance can keep squeaks at bay.
Excessive Wear
Wear and tear on your tread belt can affect its lifespan.
| Cause of Wear | Action to Take |
|---|---|
| Belt misalignment | Realign following Peloton’s instructions |
| Debris on belt/deck | Clean regularly with a soft, damp cloth |
| Old belt | Consider replacing if adjustments don’t help |
Regular checks and adjustments prevent early wear. Keep your machine clean and well-maintained for the best performance.
Remember to unplug your tread before making any adjustments. Consult the Peloton support team or manual if you need extra help!
Testing And Safety Check
Embarking on a ‘Testing and Safety Check’ of your Peloton tread belt is crucial to ensuring a smooth, safe workout experience. Proper adjustment of your tread belt can mean the difference between an effective session and potential equipment damage or personal injury. One must handle this process with due diligence, adhering to the manufacturer’s guidance and operating within safety norms. Attention to detail during the testing phase not only guarantees your tread belt’s optimal performance but also extends its lifespan.
Running A Slow Test
Begin by powering on your Peloton treadmill at the lowest speed. This ‘Slow Test’ allows for close monitoring of the belt’s motion and tracking of any misalignments. Keep an eye out for any drifting or slipping of the belt, which indicates a need for adjustments. The goal is to have the belt running straight and true without any lateral movement. Your safety and tread longevity depend on this precision.
Observing The Adjustments
Once you’ve identified the need for adjustment, proceed carefully. Make incremental changes, using the provided Allen wrench to fine-tune the belt tension and alignment. Restart the treadmill at the low speed after each adjustment session to observe the belt’s behavior. It should move smoothly without any signs of over-tightening or looseness. Consistent observation leads to precise calibration.
Preventive Maintenance Tips
- Regular Inspection: Conduct a visual and physical check-up of the belt before each use. Ensure it’s clear of any debris that could cause damage.
- Correct Alignment: Make sure the belt is perfectly centered and has even tension on both sides. This prevents uneven wear and tear.
- Cleanliness: Keep the belt and deck clean. Proper cleaning prevents buildup that can affect performance.
- Lubrication: Apply lubricant to the belt as recommended. This reduces friction and protects the components.
The key to a well-functioning Peloton treadmill rests in your hands. Embrace these maintenance practices to enrich your exercise endeavours and prolong the life of your machine.
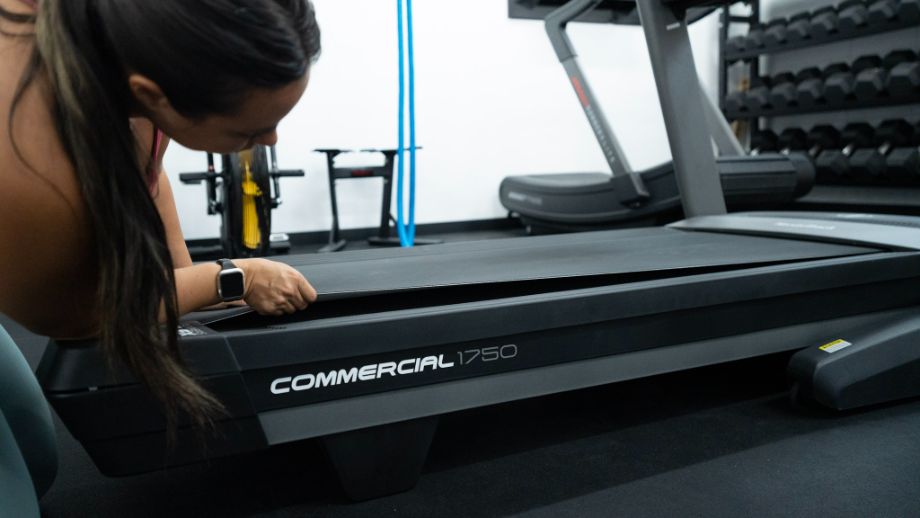
Credit: www.garagegymreviews.com
Seeking Professional Help
Adjusting a Peloton Tread belt can seem daunting. Safety and proper functioning are top priorities for a great workout experience. If troubleshooting doesn’t solve the issue, it’s time to seek professional help. Contacting support ensures you maintain the integrity of your machine and avoid voiding the warranty with DIY fixes.
When To Contact Support
You should reach out to Peloton support in the following cases:
- Uneven wear on the tread belt
- Slipping or noise during use
- Difficulty with calibration or alignment
If these issues persist after following the manual’s basic maintenance steps, professional assistance is the safest option.
Warranty And Repair Services
Understanding warranty terms is crucial. Peloton’s warranty often covers the cost of service and parts for repairs. Here’s what to know:
| Warranty Coverage | Inclusions |
|---|---|
| Frame | 5 years |
| Components | 12 months |
| Labor | 12 months |
For issues covered under warranty, do not attempt repairs. Immediate contact with Peloton Support will guide you on the next steps for warranty and repair services.
Frequently Asked Questions Of How To Adjust Peloton Tread Belt
How Do I Tighten The Belt On My Peloton Tread?
To tighten the belt on your Peloton Tread, follow these steps: Turn off the treadmill and unplug it. Locate the belt adjustment screws at the rear of the deck. Use the provided Allen wrench to turn both screws clockwise, making quarter-turn increments.
Check the belt tension and repeat if necessary. Plug in and turn on the Tread to test.
How Do You Adjust A Peloton Bike Belt?
To adjust a Peloton bike belt, turn off the bike and remove the cover. Loosen the tensioning bolt. Align the belt correctly, then tighten the bolt. Replace the cover and turn on the bike to test.
How Do You Adjust A Treadmill Belt Alignment?
Turn off and unplug your treadmill. Locate the alignment screws at the rear end. Turn the left screw a quarter turn clockwise to shift the belt to the right, and vice versa for the left. Repeat as needed, ensuring small adjustments.
Plug the treadmill back in and test the alignment.
How Do You Center A Peloton Belt?
To center a Peloton bike belt, first, power off the bike. Then, loosen the belt by adjusting the tension screws. Center the belt manually, retighten the screws, and power on the bike to check the belt alignment. Repeat adjustments if necessary.
Conclusion
Maintaining your Peloton tread belt with proper adjustments ensures a smoother run and prolongs its life. Simple steps can lead to significant improvements in your workout experience. Remember, regular upkeep is key. Roll out with confidence, and enjoy every stride on a well-tuned machine.
Happy running on your optimized Peloton tread!

