Kayaking is a fun and rewarding water activity, but your experience can quickly turn uncomfortable or even unsafe if you do not hold your paddle the right way. Many beginners focus on buying the best kayak or choosing the perfect location, but few realize that proper paddle grip is the key to better speed, control, and comfort on the water. Whether you are a new kayaker or looking to improve your skills, learning how to hold a kayak paddle correctly will help you paddle longer, avoid injuries, and enjoy your time outdoors.
This article explains everything you need to know about holding a kayak paddle. We cover the basics, common mistakes, advanced tips, and practical advice that even experienced paddlers sometimes overlook. By the end, you will understand not just the “how,” but also the “why” behind good paddle technique.
Why Proper Paddle Holding Matters
Your paddle is your main tool on the water. How you hold it affects every movement:
- Efficiency: Good grip means you move further with less effort.
- Comfort: Reduces hand, wrist, and shoulder pain.
- Control: Helps you steer, stop, and turn easily.
- Safety: Prevents injuries like blisters or tendon strain.
Small mistakes in grip can lead to fatigue or even force you to cut your trip short. Proper technique is not just for professionals—every kayaker benefits.
Understanding The Kayak Paddle
Before you grip your paddle, it helps to know its parts and design. Each part plays a role in how you hold and use it.
| Paddle Part | Description | Importance for Grip |
|---|---|---|
| Shaft | The long, straight part you hold | Main contact with your hands |
| Blade | Flat, wide ends that push water | Blade orientation matters for correct grip |
| Drip Rings | Rubber rings near the blade | Help keep water off your hands |
| Feather | Angle between blades | Changes wrist position and grip technique |
Most recreational paddles have a straight shaft and symmetrical blades, but some are bent or have asymmetrical blades. Always match your grip to your paddle design.
Step-by-step: How To Hold A Kayak Paddle Correctly
Let’s break down the correct method into clear steps. Follow these in order, and practice each one to build muscle memory.
1. Find The Center Of The Paddle
Stand or sit up straight. Hold the paddle horizontally in front of you, with both hands just wider than your shoulders. The paddle should feel balanced, not tipping to one side.
Tip: Most paddles have a logo or design in the middle—use it to find the center.
2. Identify The Blade Orientation
Many beginners hold the paddle upside down or backward. Here’s how to check:
- The long edge of each blade should be on top.
- The concave side (slightly scooped) faces you.
- If your paddle has writing or a logo, it usually faces you.
Hold the paddle up and compare both sides if you are unsure.
3. Set Your Hand Position
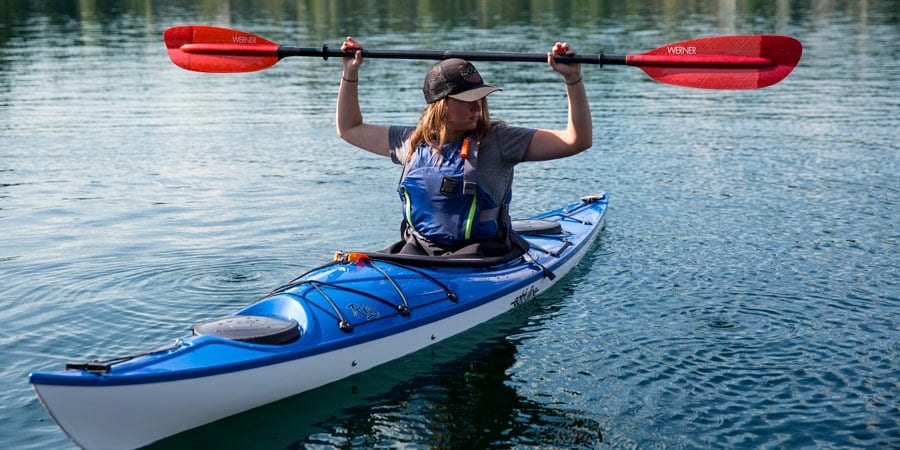
Place your hands on the shaft so that your elbows make a rough right angle (90 degrees) when holding the paddle above your head.
- Hands should be evenly spaced from the center.
- Avoid holding too close together (less control) or too far apart (fatigue).
4. Use A Relaxed Grip
Many people grip too tightly, causing tension and pain. Instead:
- Wrap your fingers loosely around the shaft.
- Your thumb and index finger should make a gentle “O” shape.
- If someone tried to pull the paddle away, it should not slip, but your knuckles shouldn’t turn white.
This relaxed grip saves energy and protects your joints.
5. Adjust For Feathered Paddles
Some paddles have blades set at an angle (feathered). If yours does, you must rotate one wrist (usually your dominant hand) to keep the blade in the water.
- The control hand (right or left, depending on your paddle) holds the shaft firmly.
- The other hand allows the shaft to rotate slightly.
Practice rotating the paddle with your control hand to get used to this movement.
6. Check Hand Symmetry
Both hands should mirror each other on the shaft. Uneven grip leads to paddling in circles or working harder on one side.
A quick test: Hold the paddle out in front of you and check if both blades are aligned. If not, adjust your hands.
7. Keep Wrists Straight
Bent wrists are a common cause of pain. Keep your wrists in line with your forearms as you paddle.
Imagine shaking hands with someone—this is the natural, neutral position your wrist should be in.
Common Mistakes And How To Fix Them
Learning from others’ mistakes can save you time and effort. Here are errors even experienced kayakers sometimes make:
Gripping Too Tight
This is the number one cause of sore hands and wrists. If you notice your hands hurting or getting tired quickly, loosen your grip. Trust your fingers to hold the paddle without squeezing hard.
Wrong Blade Orientation
It’s easy to grab the paddle upside down or backward, especially when launching in a hurry. Always check the blade shape before starting.
Uneven Hand Position
If one hand is closer to the center than the other, your kayak will veer off course. Mark the shaft with tape or use the paddle’s design as a reference.
Bent Wrists
Avoid bending your wrists up or down. This causes strain and increases the risk of tendon injuries. Focus on keeping wrists straight throughout the stroke.
Not Using The Control Hand For Feathered Paddles
If you have a feathered paddle and do not use a control hand, your blade will not enter the water cleanly. Practice on land before going out.
How Paddle Design Affects Grip
Not all paddles are alike. Here’s how different features change the way you hold your paddle.
| Paddle Feature | Effect on Grip | Best For |
|---|---|---|
| Straight Shaft | Simple, natural grip; easy for beginners | Recreational paddlers |
| Bent Shaft | Reduces wrist strain; changes hand position slightly | Long-distance or performance paddlers |
| Feathered Blades | Requires rotating one wrist (control hand) | Windy conditions, advanced users |
| Symmetrical Blades | Easier to hold correctly; less chance of mistakes | Beginners, casual use |
| Asymmetrical Blades | More efficient; must check orientation each time | Touring, high-performance |
Choose a paddle that matches your style and experience. If you often forget blade orientation, start with a symmetrical, straight-shaft paddle.
Practical Tips For A Better Grip
Even small changes in your technique can make a big difference. Here are some practical tips, including insights many beginners miss:
- Warm Up Your Hands: Do simple stretches or squeeze a ball before paddling. Warm muscles are less likely to cramp or tire.
- Wear Paddle Gloves: If your hands blister easily, thin gloves can help without making your grip slippery.
- Mark Hand Positions: Use waterproof tape to mark where your hands should go. This works especially well for kids or group rentals.
- Check Drip Rings: Adjust the rubber rings so they keep water off your hands but do not block your grip area.
- Switch Grip Often: On long trips, relax your grip and wiggle your fingers every 10-15 minutes to improve circulation.
- Practice on Land: Before getting in the water, practice your grip and stroke in your yard or living room. Muscle memory builds faster this way.
- Try Different Paddles: Borrow paddles from friends or outfitters to see what feels best. Some people prefer a thicker or thinner shaft.
- Rest When Needed: If your hands or wrists start to hurt, take a break. Pushing through pain can lead to injury.
Non-obvious insight: Many beginners do not realize that the “best” grip is not always the tightest or strongest. A light, flexible grip often gives you more power because your muscles stay relaxed.

Advanced Techniques For Experienced Paddlers
Once you are comfortable with the basics, you can fine-tune your grip for more speed, efficiency, or special conditions.
Using The Control Hand
With feathered paddles, your control hand (usually your right if you are right-handed) stays fixed, while the other hand rotates during each stroke. This minimizes wrist movement and keeps the blade at the correct angle.
Loose And Firm Switching
In rough water or wind, you might need a firmer grip for control. But on calm water, switch back to a relaxed grip to save energy.
Low Vs. High Angle Paddling
| Paddling Style | Hand Position | When to Use |
|---|---|---|
| Low Angle | Hands close to water; relaxed grip | Long distance, slow speed |
| High Angle | Hands higher; more aggressive grip | Fast paddling, racing, maneuvering |
Switch between these based on your activity and comfort.
Adapting To Cold Weather
If you paddle in cold water, numb hands can lead to loss of control. Wear gloves, use paddle grips, and keep your hands moving, even when resting.
How To Test Your Grip
It’s easy to think you are holding the paddle correctly, but self-checks make a big difference.
- After 10 minutes of paddling, stop and look at your hands. Are they tired or red? If so, relax your grip.
- Watch for blisters forming—this means too much friction, probably from gripping too tight or unevenly.
- Ask a friend to watch your technique or take a video.
Small adjustments now prevent bad habits later.

Injury Prevention: Protecting Your Hands And Wrists
Many paddlers get sore hands or wrists, especially on longer trips. Here’s how to protect yourself:
- Use a relaxed grip most of the time.
- Stretch before and after paddling.
- Change hand positions during breaks.
- Hydrate—dehydration increases muscle cramps.
- Apply tape or wear gloves if you notice hot spots on your skin.
Do not ignore pain. Early warning signs mean it’s time to rest or change your grip.
Real-world Example: A Beginner’s Progress
Sara, a beginner kayaker, found her arms and hands were always sore after paddling. She realized she was gripping her paddle tightly and holding it unevenly—one hand closer to the center. After learning the correct hand position and relaxing her grip, she paddled longer with less pain.
She also marked her paddle with tape, which made it easy to check her hand placement each trip.
This story shows how small changes can have a big impact on your comfort and performance.
Frequently Asked Questions
How Do I Know If I’m Holding The Paddle Upside Down?
Check the blade shape—the longer edge should be on top, and the scooped or concave side should face you. If there is a logo or writing, it usually faces you as well.
Should I Use A Tight Or Loose Grip On My Paddle?
Use a relaxed grip. Your fingers should wrap around the shaft, but you should not squeeze tightly. A light grip reduces fatigue and prevents injury.
What Is A Control Hand, And How Do I Know Which To Use?
A control hand is the hand that holds the shaft firmly, especially with feathered paddles. It is usually your dominant hand (right hand for right-handed paddlers). The other hand allows the shaft to rotate during each stroke.
How Do I Prevent Blisters When Kayaking?
Wear thin paddle gloves, use tape on hot spots, and keep your grip relaxed. Take breaks and wiggle your fingers to improve circulation.
Does Paddle Length Affect How I Hold My Paddle?
Yes, paddle length changes your hand spacing and angle. Make sure your hands are shoulder-width apart and elbows at 90 degrees. A paddle that is too long or short makes good grip harder.
For more about kayak paddling techniques, you can visit the Wikipedia Kayaking page.
Holding your kayak paddle correctly is a simple skill that leads to better performance, safety, and enjoyment on the water. Practice the steps, avoid common mistakes, and pay attention to your comfort. Small improvements in grip make a big difference in your kayaking adventure.
