
Inflating a paddle board seems simple, but if you’re new to the sport, connecting the pump to the valve can feel tricky. A secure connection is the first step to a safe, sturdy, and fun day on the water. Mistakes here can lead to leaks, poor inflation, or even damage. This guide will show you exactly how to attach a paddle board pump to the valve, explain different valve types, highlight common mistakes, and answer all your top questions. Whether you’re using a manual or electric pump, by the end, you’ll have the confidence to inflate your board perfectly every time.
Exclusive Deals
Limited-time Exclusive Deals. Check current discount on Amazon.
Check Price on Amazon As an Amazon Associate I earn from qualifying purchases.Understanding Paddle Board Valves
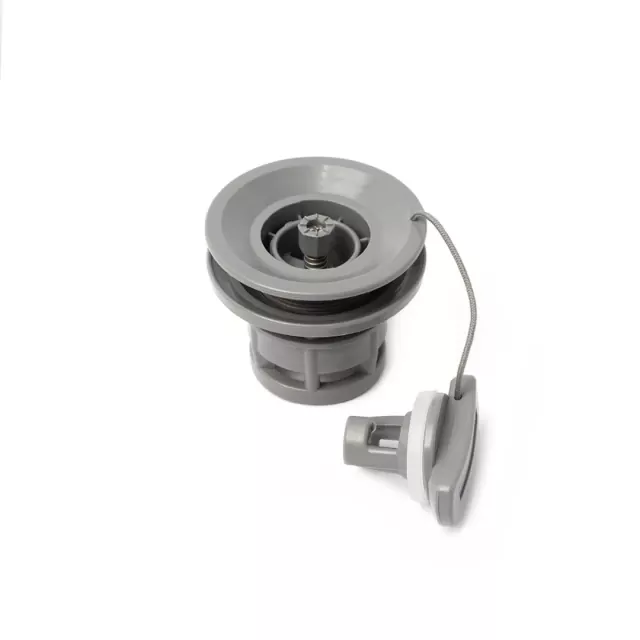
Before you start, it’s important to know which valve is on your paddle board. The most common valve for inflatable stand-up paddle boards (iSUPs) is the Halkey-Roberts (HR) valve. Some boards use other types, but HR is the industry standard.
Types Of Paddle Board Valves
| Valve Type | Common Use | How to Identify |
|---|---|---|
| Halkey-Roberts (HR) | Most inflatable SUPs | Round, gray or black, with a central pin |
| Boston Valve | Some budget boards, kayaks | Two-part valve, screws open/closed |
| Leafield C7/D7 | Premium boards, rafts | More compact, has a twist-lock cap |
Pro tip: Always check your board’s manual if you’re not sure which valve it uses.
What You Need Before Attaching The Pump
To avoid frustration, gather these items first:
Exclusive Deals
Limited-time Exclusive Deals. Check current discount on Amazon.
Check Price on Amazon As an Amazon Associate I earn from qualifying purchases.- Your paddle board
- The correct pump (manual or electric)
- The hose that fits your pump
- The adapter (usually included with your pump)
- A clean, flat area to set up
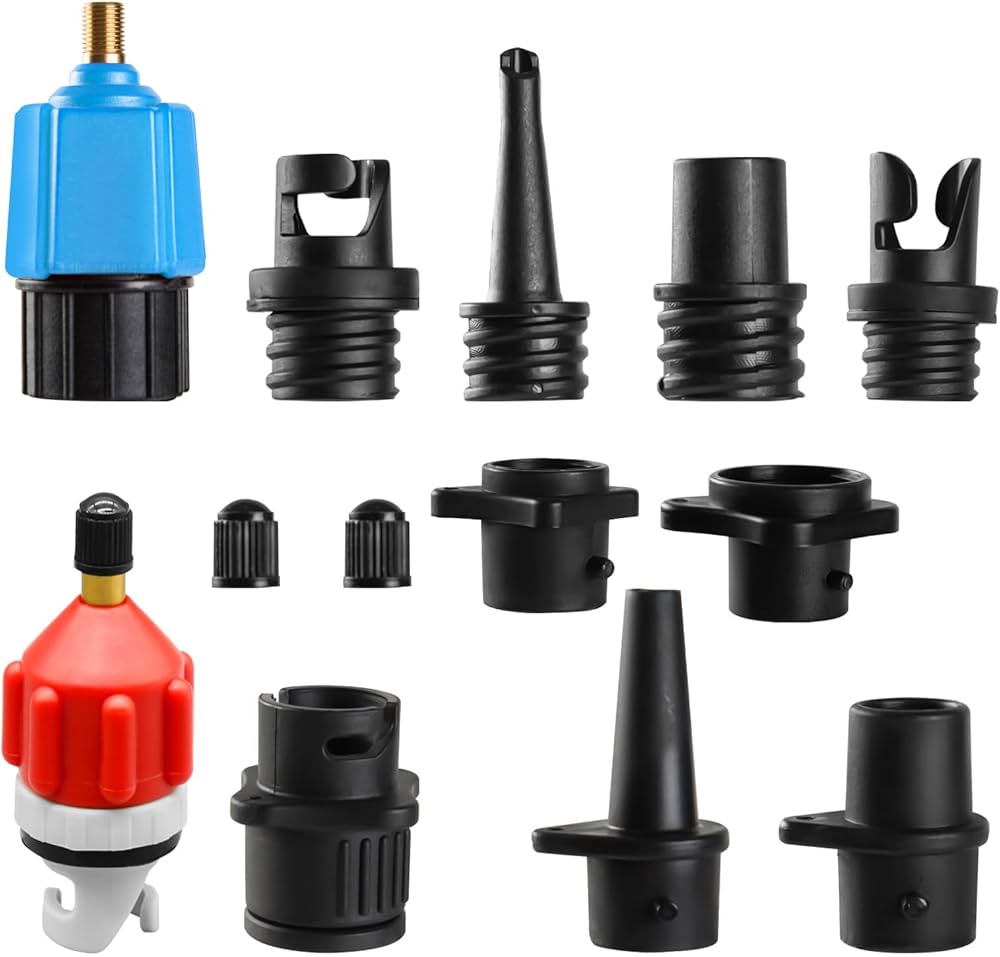
Check your pump kit for extra adapters. Many pumps come with several to fit different valves. Choose the one that matches your board’s valve.
Step-by-step: Attaching A Paddle Board Pump To The Valve
Follow these clear steps for a secure, leak-free connection:
1. Prepare The Valve
- Remove the valve cap by unscrewing it.
- Check the valve pin inside. For most HR valves, the pin has two positions:
- Up position: Closed (air stays in)
- Down position: Open (air flows out)
- Make sure the pin is up (closed) before attaching the pump. Press it gently with your finger if needed.
2. Select The Right Adapter
- Find the adapter in your pump kit that fits snugly into your board’s valve.
- For HR valves, this is usually a bayonet-style adapter with two or three small tabs.
3. Attach The Hose To The Pump
- Connect one end of the hose to your pump.
- Some pumps have two ports: One for inflate, one for deflate. Use the inflate port.
4. Attach The Adapter To The Valve
- Insert the adapter into the valve.
- Twist clockwise until it locks into place. You should feel a gentle resistance; do not over-tighten.
- If you hear air escaping, remove and reattach the adapter, ensuring a proper seal.
5. Check The Seal
- Slightly tug the hose. The connection should feel secure.
- If the adapter pops out easily, try again, making sure you align the tabs correctly.
6. Begin Pumping
- Start inflating your paddle board. For manual pumps, use steady, smooth strokes.
- For electric pumps, follow the manufacturer’s instructions. Set the correct pressure (usually between 12–15 PSI for most SUPs).
7. Monitor Pressure
- Many pumps have a built-in pressure gauge.
- Stop inflating when you reach the recommended PSI.
8. Remove The Pump
- Twist the adapter counterclockwise to detach.
- Do this quickly to prevent a burst of air from escaping.
- Immediately replace the valve cap to keep the air sealed inside.
Manual Vs. Electric Pumps: What’s Different?
Paddle boarders often ask if there’s a difference between attaching a manual and an electric pump. The basic steps are the same, but there are a few key points:
Exclusive Deals
Limited-time Exclusive Deals. Check current discount on Amazon.
Check Price on Amazon As an Amazon Associate I earn from qualifying purchases.| Type of Pump | Attachment Process | Extra Tips |
|---|---|---|
| Manual | Attach hose, lock adapter, start pumping | Check gauge regularly, avoid over-inflating |
| Electric | Attach hose, set desired PSI, let pump run | Stay nearby, some pumps auto-stop at set PSI |
Non-obvious insight: Electric pumps can sometimes push the adapter out if not locked well. Always double-check the fit before starting.
Common Mistakes When Attaching The Pump
Avoiding these errors saves time and prevents damage:
- Forgetting to check the valve pin position. If the pin is down (open), air will escape as soon as you remove the pump.
- Using the wrong adapter. Forcing an adapter can damage the valve.
- Not locking the adapter. This leads to leaks and slow inflation.
- Over-tightening. Tightening too hard can strip the threads or break the valve.
- Ignoring debris. Dirt or sand in the valve can prevent a good seal.
Beginner tip: Always carry a small towel to wipe the valve area before attaching the pump.
Troubleshooting: If The Pump Won’t Attach Or Air Leaks
If you’re struggling, try these fixes:
- Adapter won’t fit: Double-check you have the right adapter for your valve. Some boards may need a special size.
- Air leaks around the adapter: Remove the hose, clean the valve area, and reattach. If it still leaks, the O-ring on your adapter may be worn out.
- Valve won’t close: Make sure the pin is in the up (closed) position before removing the pump.
Extra insight: If your adapter’s rubber O-ring is missing or cracked, it won’t seal. Keep a spare O-ring in your kit.
Why Getting A Good Seal Matters
A tight, leak-free connection is more than just convenience. Here’s why it’s important:
- Safety: Under-inflated boards can bend or sink.
- Performance: The right pressure keeps your board stable and fast.
- Board life: A good seal prevents sand or water from entering the valve, which can cause damage over time.
How To Choose The Right Pump And Adapter
Not all pumps and adapters are equal. Here’s what to consider:
- Compatibility: Make sure the adapter matches your valve. Most quality pumps include a Halkey-Roberts adapter.
- Pressure Gauge: Essential for reaching the correct PSI.
- Build Quality: Cheap pumps or adapters often have poor seals or break easily.
- Ease of Use: Features like dual-action pumping or electric auto-stop can save effort.
Non-obvious insight: Some “universal” adapters fit multiple valves, but the seal may be less reliable. Always test the fit before heading to the water.
Maintenance Tips For Pump And Valve
To keep your equipment working well:
- After each use, rinse the valve and adapter with fresh water.
- Let all parts dry before storing to prevent mold or corrosion.
- Store your pump and adapters in a dry, cool place.
- Check the O-ring on your adapter often. Replace if cracked or missing.
Pro tip: Once a month, apply a little silicone spray to the valve’s O-ring for a smoother fit.
Quick Comparison: Manual Vs. Electric Paddle Board Pumps
Here’s a side-by-side look at the pros and cons:
| Manual Pump | Electric Pump | |
|---|---|---|
| Effort | High (physical pumping) | Low (automatic) |
| Setup Time | Quick | Quick, but needs power |
| Portability | Very portable | Heavier, needs battery or car plug |
| Cost | Lower | Higher |
| Control | Full manual control | Automatic stop at set PSI |
Expert advice: If you paddle often, consider investing in a good electric pump. For occasional outings, a manual pump is fine.
Additional Tips For First-time Users
- Practice attaching the pump at home before your first trip.
- If possible, inflate your board on a soft surface (like grass) to avoid damaging the valve.
- Always double-check the PSI. Over-inflation can burst your board, while under-inflation affects performance.
Little-known fact: Some high-end boards use double-chamber pumps for faster inflation. The attachment process is the same, but you’ll switch modes as you pump.
When To Replace Your Valve Or Adapter
If you notice persistent leaks, trouble attaching the adapter, or visible cracks, it may be time to replace the valve or adapter. Replacement valves and adapters are available from most SUP brands or specialty retailers.
For more technical details about valve types and their uses, you can visit the Halkey-Roberts valve Wikipedia page.

Frequently Asked Questions
How Do I Know If My Pump Adapter Fits My Paddle Board Valve?
Most inflatable paddle boards use a Halkey-Roberts valve, which needs a matching adapter. The adapter should slide in and twist to lock. If it doesn’t fit, check your pump kit for other adapters or consult your board’s manual.
What Do I Do If Air Keeps Leaking When I Attach The Pump?
Check that the valve pin is in the up (closed) position and that the adapter is fully locked in place. Clean any sand or dirt from the area. If it still leaks, the O-ring on your adapter may need replacing.
Can I Use Any Sup Pump For My Board?
Not always. The pump must have the right adapter for your board’s valve. Most manual and electric SUP pumps are compatible with Halkey-Roberts valves, but always check before buying.
How Much Should I Inflate My Paddle Board?
Most inflatable paddle boards require between 12 and 15 PSI. Check your board’s manual for the exact recommended pressure. Over-inflating can cause damage, while under-inflating affects stability.
Do I Need To Lubricate The Valve Or Adapter?
Yes, occasionally. Using a little silicone spray on the valve’s O-ring can help create a better seal and make attaching the adapter easier. Don’t use petroleum-based products, as they can damage the rubber.
Getting the pump attached right is a small step that makes a big difference in your paddle boarding experience. Take a few moments to learn your equipment, and inflating your board will become fast, easy, and reliable. Soon, you’ll be ready to enjoy every paddle with confidence and peace of mind.

