
Ice climbing is one of the most thrilling and demanding mountain sports. You move up frozen waterfalls, icy cliffs, or steep snowfields, using technical equipment and sharp skills. But if there’s one piece of gear that keeps you safe and lets you push higher, it’s the rope.
The way you use ropes in ice climbing is both an art and a science. In this article, you’ll learn how ropes work in ice climbing, why they matter, which techniques are essential, and what mistakes to avoid. Whether you’re a beginner or looking to sharpen your skills, understanding ropes in ice climbing is vital for safety and success.
Why Ropes Are Essential In Ice Climbing
Ropes are the main safety line between you and a fall. On ice, a slip can happen quickly—even for experts. The right rope not only stops a fall but also helps the climber move efficiently. Ropes let you climb higher, protect your partner, and lower down safely when the climb is over.
Unlike rock climbing, ice climbing often has less secure protection, so the rope system must be strong and reliable.
A common mistake beginners make is thinking any climbing rope will work for ice. But ice climbing ropes must handle cold, wet, and sharp conditions. They also need to work well with ice tools and protection devices.
Types Of Ropes Used In Ice Climbing
Choosing the right rope is your first big decision. Not all ropes are the same. Here’s how ice climbing ropes compare:
| Rope Type | Main Use | Diameter (mm) | Advantages | Disadvantages |
|---|---|---|---|---|
| Single Rope | General climbing | 8.9–10.2 | Simple system, easier belaying | Heavier, less flexible in rope drag |
| Half Rope | Ice/mixed terrain | 8.0–9.0 | Reduces rope drag, more safety | More complex to manage |
| Twin Rope | Very long pitches | 7.5–8.5 | Lighter, can rappel full length | Both ropes must be clipped together |
Most ice climbers use half ropes or twin ropes because they offer more security and make long rappels safer. Half ropes are clipped to different pieces of gear, lowering rope drag and protecting both climbers if one rope is damaged by sharp ice.
Dry Treatment
Ice climbing ropes must be dry treated. This means the rope’s fibers are coated to resist water. Wet ropes freeze, become stiff, and lose strength. Dry treatment keeps the rope flexible and strong, even in melting conditions.
How Ropes Protect Climbers On Ice
Dynamic Vs. Static Ropes
Ice climbing uses dynamic ropes. These ropes stretch under load, absorbing the energy of a fall and reducing the shock to both the climber and the protection. Using a static rope—which barely stretches—can be dangerous, as the impact force on gear and your body is much higher.
Rope Systems In Ice Climbing
There are three main rope systems:
- Single Rope System: One rope, simple to manage, often used on straightforward routes.
- Half Rope System: Two ropes, each clipped to different gear, common on wandering or zig-zag routes.
- Twin Rope System: Two ropes, always clipped together, often used for very long climbs or where extra security is wanted.
Knowing which system to use is key to safety and efficiency.
Essential Rope Techniques For Ice Climbing
Mastering rope techniques can mean the difference between a safe climb and a risky one. Here are the most important:
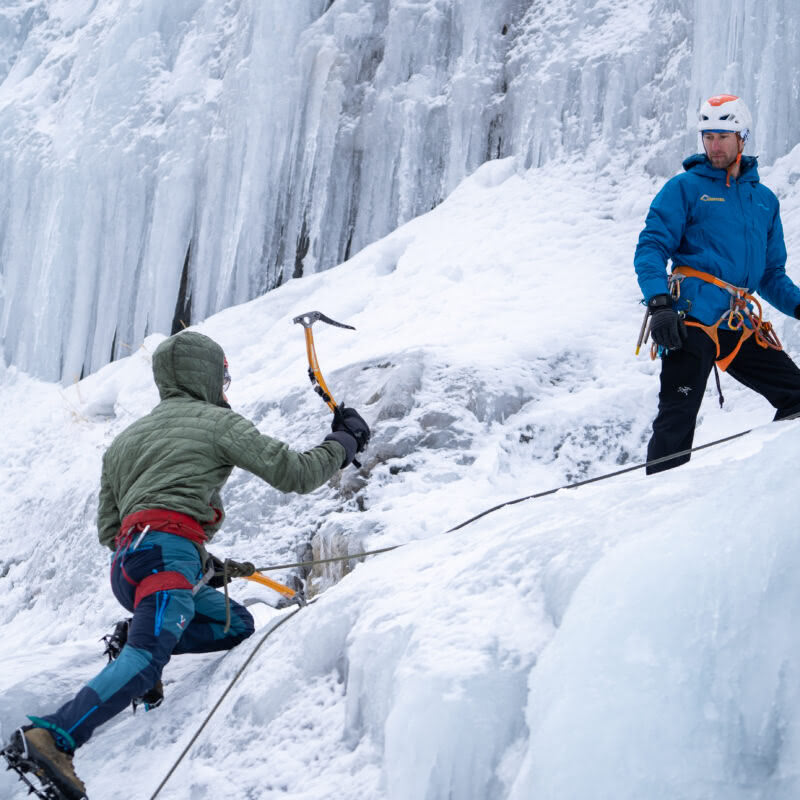
Belaying
Belaying is how the second climber keeps the leader safe. In ice climbing, belaying must be secure and adapted for cold conditions. Gloves can make handling the rope harder, so practice is critical. An ATC Guide or similar belay device works well, especially for bringing up a second climber from an anchor.
Tying Knots
You need to tie knots while wearing gloves. The figure-eight follow-through is the standard knot for tying in. Other key knots:
- Clove hitch: For anchoring quickly.
- Double fisherman’s knot: For joining ropes.
- Overhand knot: For rappelling.
Rope Management
Keeping your rope untangled and off the wet snow is important. Use a rope bag or stack your rope neatly at the belay. On windy days, ropes can freeze or tangle, so check often for knots and twists.
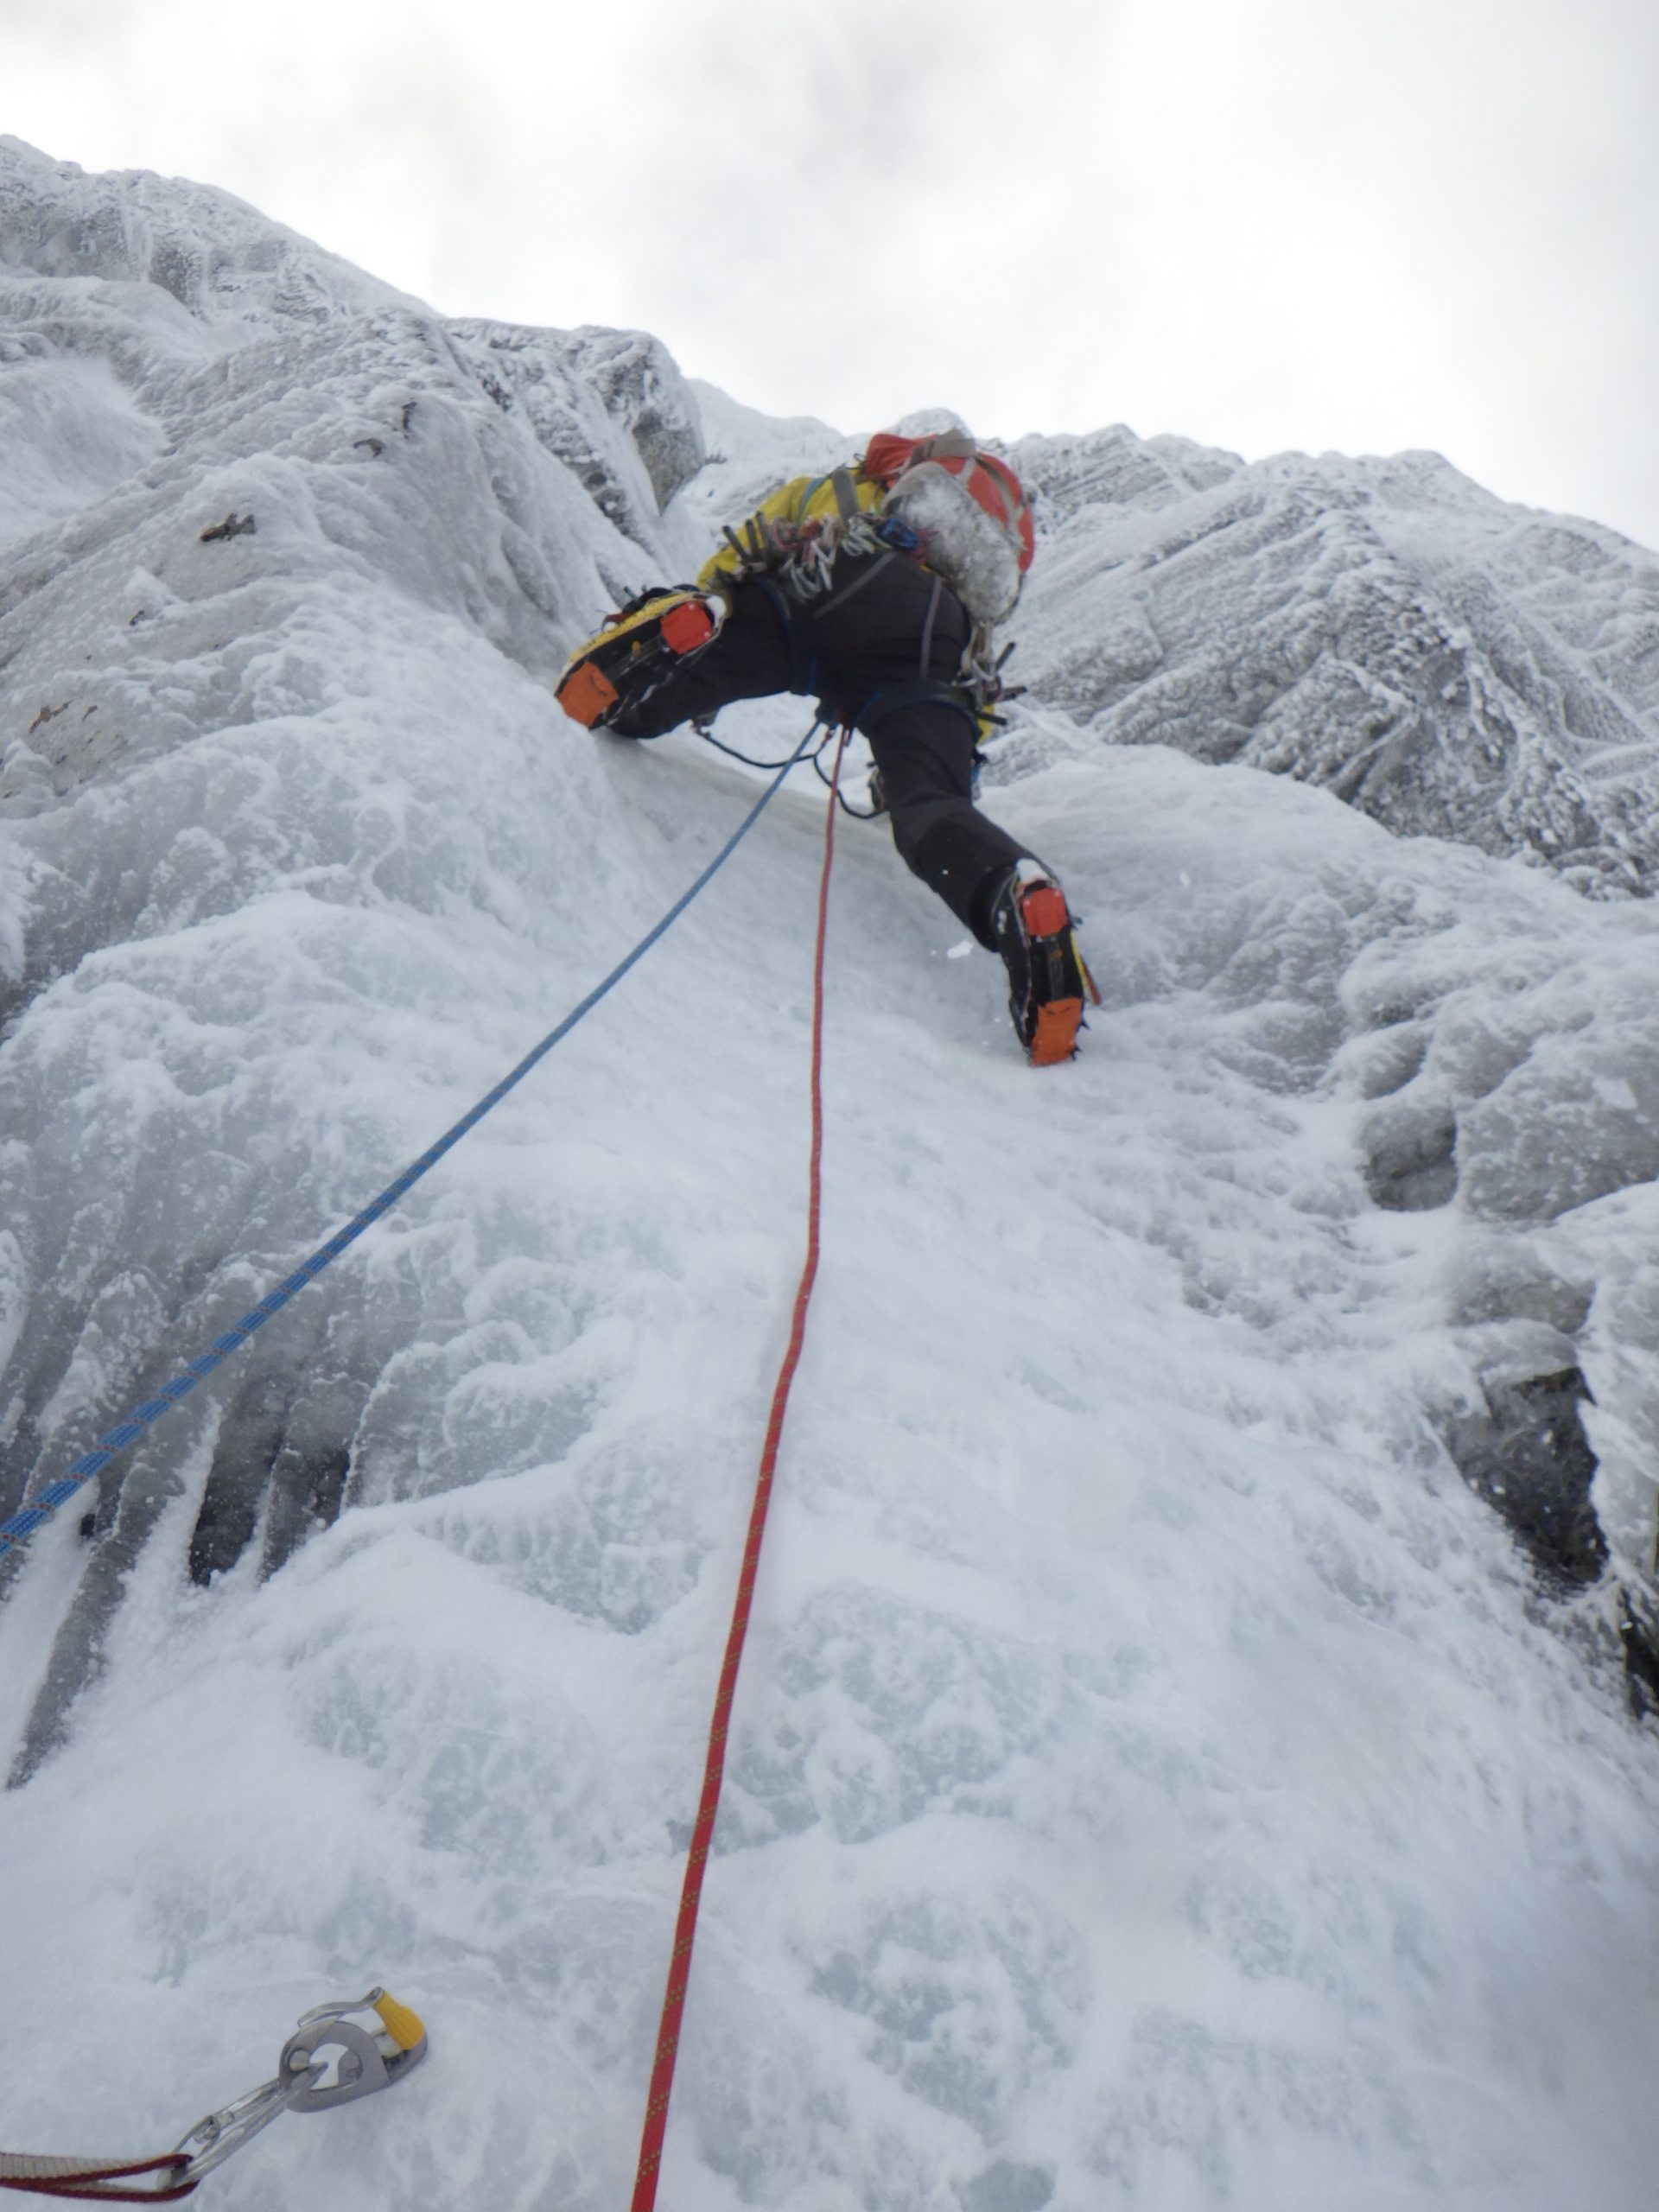
Lead Climbing
In ice climbing, the leader climbs first, placing ice screws for protection, and clips the rope through quickdraws. The second climber removes the screws while following. On long, wandering routes, half ropes reduce drag and provide more options if the ice is thin or protection is far apart.
Simul-climbing
Experienced teams sometimes simul-climb: both climbers move at the same time, protected by several pieces of gear between them. This is advanced, risky, and should only be tried with training and good communication.
Rappelling
Getting down safely is as important as going up. On ice, you often rappel using two ropes tied together, threading them through a V-thread anchor made in the ice. Always check that the ropes are even, free of knots, and that the anchor is solid.
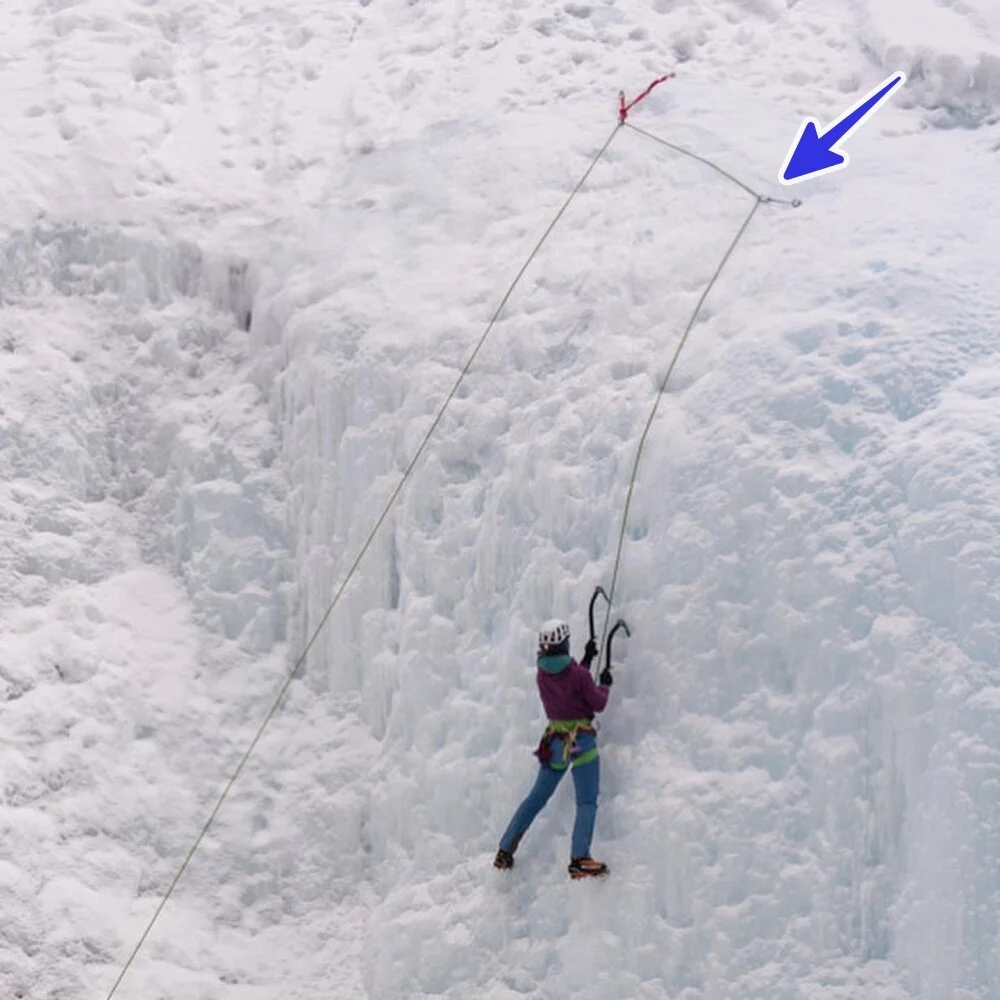
Setting Up Anchors And Belays
Anchors are your lifeline on the ice. Ice anchors are often less secure than rock anchors, so rope use matters even more.
Types Of Ice Anchors
- Ice screws: The most common. Place at least two for a main anchor.
- V-thread (Abalakov anchor): A hole drilled in the ice in a V-shape, using the rope or cord as the anchor.
- Natural anchors: Sometimes, frozen trees or rock features can work.
Equalizing Anchors
When building an anchor, use the rope to equalize the load across all points. A cordelette or the rope itself can be used to tie an equalized anchor. This spreads the force and improves safety.
Belaying From The Anchor
The belayer often attaches themselves to the anchor with the rope, then brings up the second climber. Use a guide mode belay device to add security, especially if the anchor might be weak.
Rope Handling In Extreme Conditions
Dealing With Wet, Frozen Ropes
Even with dry treatment, ropes can freeze. If your rope becomes stiff, it’s harder to belay and tie knots. Always dry your rope after climbs, and store it in a warm place.
Rope Drag
Ice routes often wander, so rope drag can become a problem. Using half ropes, extending your quickdraws, and careful rope management reduce drag. When drag gets heavy, it can stop your progress and make falls more dangerous.
Protecting Your Rope From Sharp Ice
Ice can be as sharp as glass. Never let your rope run over sharp edges, and avoid placing protection where the rope might get cut. Inspect your ropes often for damage.
Common Rope Mistakes In Ice Climbing
Even experienced climbers can make errors with ropes. Here are some to watch out for:
- Using a non-dry-treated rope: Wet ropes freeze and lose strength.
- Poor anchor building: Anchors must be solid; weak anchors can fail during a fall or rappel.
- Bad knot tying: Practice tying knots with gloves on.
- Rope behind the leg: Always keep the rope in front of your body to avoid tripping or being flipped upside down in a fall.
- Not checking for core shots: If you see the white inner core, retire the rope immediately.
Non-obvious insight: Ropes are not just about catching falls—they also help you communicate. Tugs on the rope can signal your partner when voice is impossible due to wind or distance.
Comparing Ropes For Ice Climbing
It’s helpful to compare ropes side by side when choosing your gear:
| Brand/Model | Type | Diameter (mm) | Weight (g/m) | Dry Treatment | Best Use |
|---|---|---|---|---|---|
| Petzl Volta Guide | Single/Half/Twin | 9.0 | 55 | UIAA Dry | Alpine & ice |
| Beal Ice Line | Half/Twin | 8.1 | 39 | Golden Dry | Technical ice |
| Mammut Genesis | Half | 8.5 | 48 | Dry | All-round ice |
This side-by-side comparison shows that weight, diameter, and dry treatment are top factors to consider. Lighter ropes are easier to carry, but thinner ropes require more careful handling.
Safety Tips For Rope Use In Ice Climbing
- Double-check all knots and anchors before climbing.
- Carry a knife in case you need to cut a rope quickly (for rescue).
- Replace ropes that show signs of damage or heavy wear.
- Practice rope skills in gloves before your climb.
- Communicate clearly with your partner using both voice and rope signals.
Extra tip: Always bring a backup cord for building V-thread anchors. Sometimes your main rope is too thick or frozen, and a thin cord works better.
How To Care For Your Rope
Proper care extends your rope’s life and keeps it safe:
- Dry your rope after each climb. Hang it in a warm, dry place.
- Never store ropes in direct sunlight, as UV rays weaken fibers.
- Wash your rope gently with cold water if it gets muddy or salty.
- Inspect for cuts, flat spots, or fuzz after every climb.
According to the UIAA, a climbing rope used heavily on ice should be replaced every 2–3 years, or sooner if damage is found (UIAA).
Frequently Asked Questions
What Is The Best Rope Diameter For Ice Climbing?
Most ice climbers choose ropes between 8.1 mm and 9.0 mm. Thinner ropes are lighter and create less drag but need more careful handling. For beginners, a slightly thicker rope (around 8.5 mm) offers a good balance of durability and safety.
Can You Use A Rock Climbing Rope For Ice Climbing?
You can, but it must be dry treated. Regular rock climbing ropes absorb water, freeze, and become unsafe. Always check for a dry treatment label before using any rope on ice.
How Do You Tie A V-thread Anchor With Rope?
Drill two intersecting holes in the ice, thread the rope or cord through using a V-thread tool, and tie an overhand knot. Always test the anchor before rappelling. Practice this skill before you need it on a real climb.
What Length Of Rope Is Best For Ice Climbing?
60 meters is the most common length. It allows for long pitches and full-length rappels. On very long routes, some climbers prefer 70 meters, but remember that extra length adds weight.
How Do You Check If Your Rope Is Safe To Use?
Run your hands along the entire rope. Look for cuts, flat spots, core shots (where the inner core shows), or fuzzy areas. If you find any serious damage, retire the rope immediately.
Climbing frozen waterfalls is one of the most rewarding adventures in the mountains. But only with the right rope skills can you enjoy both the thrill and the safety of the climb. Learn, practice, and respect your rope—it’s your lifeline on the ice.
